Shipping
With the exception of high-volume ordering times, our processing time is 1-4 business days. Processing times during high-volume ordering months can be 5-8 business days. Occasionally, we will offer pre-order sales on items before they are available. Details for processing and shipping times will be specified accordingly. Please note that our fulfillment center operates Monday-Friday, 9-5 PT, and that we are closed for all major US Holidays.
High Volume Months:
September, December, January, May
All transit times on our website or on carrier tracking websites are estimated. Carriers offer no refunds to its customers for weather delays or other “Acts of God” (the official legal term). If your package is on the way, please be patient. If you haven't seen movement for 5+ business days and there are no weather delay notices, please contact customer service at hello@laureldenise.com.
Please double check your shipping address and products on order before you check out. Once the fulfillment process has been started, it is difficult to make an update. Once an order has been picked up by a carrier using the address provided, the address can be changed for a fee (cost varies depending on the carrier). Please email hello@laureldenise.com with any urgent order changes and we will do all that we can to assist before fulfillment has begun. (Please note our office hours are M-F 9-5 ET)
All shipping carriers occasionally experience delays. While we remain within our processing times, once your package leaves our fulfillment center, it’s in the carrier’s hands. Weather and other factors can cause delays, so for updates, we recommend contacting the carrier directly. If you’re in the U.S. and your package hasn’t moved for 5 full business days, please contact us with your order number, and we’ll reship your order if available. During busy seasons (Nov-Jan) and with weather delays, shipments may take longer than estimated at checkout. FedEx shipping does not include our processing time.
For international orders, shipping and customs processing times vary by destination. Unfortunately, we can’t offer reshipments or refunds on international orders.
Sometimes carriers mark packages as delivered prior to delivery (we think it helps them move a little faster), your package has been delivered to a neighbor, or your package has been stolen. If this has happened to you, please reach out to the carrier directly online to notify them that your package isn’t there and reach out to your neighbors to see if anyone has received your package in error. If you've waited 3 days since receiving your delivery notification, contacted the carrier and your neighbors and still haven't gotten your order, please email us at hello@laureldenise.com with your order number and we can help. Please keep in mind that claims can be submitted no earlier than 3 days and no later than 30 days after your item is marked as delivered.
You will receive a shipping notification to the email address on your order with your tracking number when your order has been picked up and scanned by the carrier into their system. Make sure to check your email address to confirm that it has been entered correctly before checking out and to check your junk folder. Please note that you might not see updates to your tracking information for 1-2 days while USPS and FedEx process the package. If you have chosen UPS SmartPost as your shipping method, USPS will receive your package for the final part of your shipment and, unfortunately, you will not receive a new tracking number. Please email hello@laureldenise.comand we will send you the new tracking number.
If your planner arrived damaged, please save the shipping box or bubble envelope your item was shipped in and contact hello@laureldenise.com with your order number. We will submit a claim and send you a new order right away.
Our planners weigh 2.3lbs with packaging, making them too heavy for USPS First Class Mail which is the most economical choice. USPS Media Mail doesn’t allow planners and calendars (please click heref or more information on legally accepted Media Mail products). We currently offer FedEx and Economy (this is often USPS economy) to be sure that you get the lowest current rate available and the most reliable shipping times with the carrier you prefer. We are always on the lookout for new and lower rates for our products with reliable carriers.
Of course! Be sure to include your recipient's mailing address in the shipping section at checkout. There is no pricing information included on our packing slips. If you would like to include a gift message, please leave your note in the applicable box at checkout.
Yes! We are happy to offer international shipping for an additional charge. All of our shipments leave the U.S. and will spend time in the customs department once they arrive in their destination country. We cannot provide any customs clearance timing or cost estimates, but in most cases, shipments may spend anywhere from 3-10 days in customs. Any customs or import duties are charged once the order reaches its destination country and must be paid by the recipient of the order.
Orders over $85.00 qualify for free shipping. Please note that your cart total must be $85.00 after any discounts are applied for free shipping to take effect.
We do not offer free shipping on international orders at this time.
Returns
We accept returns up to 30 days after an item has been delivered (if it is in original condition - please read below). Please access our Returns Portal to begin the returns process. Once we receive the return and verify that it is free from use, we will refund the card used to complete the purchase. Original and return shipping charges are not available for refund (unless your planner arrived damaged). Refund times may vary depending on the card or payment provider used but typically process in 3 to 5 business days of item receipt.
IMPORTANT NOTE: All returned merchandise must be in new condition, unaltered, unused, free of any damage, and in its original packaging. Planners that have been written in are not eligible for returns or refunds.
Please note that we can only process refunds to the card used in checkout or issue a Laurel Denise gift card.
All items purchased on sale are final sales. There are no returns on sale items.
We are unable to accept any planners that have been used in any way.
We do not accept returns on international orders at this time.
All returned merchandise must be in new condition, unaltered, unused, and free of any damage for the refund to be processed. Please do your best to include it's original packaging (especially the planner boxes). The decorative boxes that your planners arrive in must be free of damage (do not put the return shipping label on this box). We cannot process planner refunds without the planner box or when there is writing inside. We cannot process accessories returns without the outer packaging (because the product could be damaged during return shipping).
Please email hello@laureldenise.com and provide the original order number or email address associated with the original order to get your return started. We can only provide store credit for gifts to be used on laureldenise.com.
We do not accept exchanges at this time. Please start a return using the Returns Portal above and place a new order for the item you'd like to exchange.
It can take 7-14 days (estimated) for a return to be processed after it arrives in our warehouse.
Planning
Start by visiting our Compare Our Planners page for an overview of our layouts and which planning styles work best with each one. That will help you understand what you're looking at.
Then, check out our Inspiration: Planners in Use page for inspiration on how to set up your planner. If you can "see yourself" in a planner, it helps make the hope of organization more tangible.
For detailed product introductions and in-depth planner features, don’t miss our regularly updated YouTube channel, where the Laurel Denise team shares how they use our planners to stay organized.
Planning can feel overwhelming at first, but we’re here to make it easier! Whether you’re a seasoned planner or just starting out, we’ve got you covered. Our YouTube channel is packed with content designed to inspire and guide you, and we share daily advice and ideas on Instagram Stories. You’ll also find practical tips in our blog posts, especially 6 Tips to Help You Get Started.
If you are truly just getting started with planning and aren't sure what people put into planners, check out this free printable on Getting Started: What to Put in Your Planner.
For even more inspiration, check out the "How to Start" and "Tips + Tricks" Highlights on our Instagram. If Instagram isn't your thing and you're already feeling a little overwhelmed, here’s some quick advice from Laurel to help you dive in and make the most of your planner:
Laurel’s Quick Planning Tips
- Start with a Brain Drop
Write down every task, appointment, and idea floating around in your head. Get it all out onto paper or a digital note. (For extra fun, use one of our notepads designed just for this.) - Input Deadlines
Transfer the deadlines and projects from your brain drop into your monthly and weekly planner views. You can set this up one month at a time or map out your entire year in advance. (Pro Tip: Consider planning just three months ahead. Use sticky notes as placeholders for appointments in later months—your planning style might evolve, and this approach keeps things flexible. - Assign Tasks
Take the remaining tasks from your brain drop and assign them to a specific day, week, or month. Focus on imminent tasks first, and place long-term ideas in the corresponding month’s list to revisit later. - Track Unassigned Items
Keep a small sticky note or one of our Pop-In-Panels handy with tasks that don’t have an immediate deadline. Address these as you find time and mental capacity or delegate them when possible.
Remember: Planning Is a Process
We revisit this process often, starting with a brain drop and working through the steps to organize our swirling thoughts into manageable actions. No matter where you are in your planning journey, be kind to yourself. There’s no such thing as perfect planning.
If you have any questions or need more guidance, we’re always here to help. Happy planning!
We share new content on ourYouTube channel almost every week and post daily updates onInstagram, featuring creative planner spread ideas and lots of fun. For layout-specific inspiration, explore our Instagram highlights, neatly organized by layout type.
Don't miss ourHow to Use our Planners Page that features images of some of our favorite filled in planner spreads.
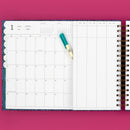
Every Laurel Denise planner layout provides space for daily, weekly, and monthly task lists and notes, featuring the signature all-in-one view that sets Laurel Denise apart. The difference between our planners is (mostly) in the short pages, which are the daily and weekly pages.
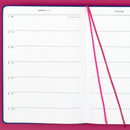
In the Horizontal Weeky Planner, these pages have horizontal lines and don't have hourly time blocks. They are in the middle of the planner, around the coil binding.
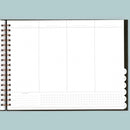
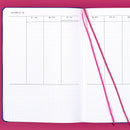
In the Vertical Weekly Planner, these short pages have vertical columns with lines and allow for a time blocked schedule. They are in the middle of the planner, around the coil binding.
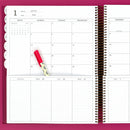
The Portrait Planner is bound with a spiral and the short weekly and daily pages are along the bottom of the planner. Each day has a vertical lined column in this planner.
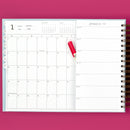
In the Project Planner, there are no daily or weekly short pages around the coil (although you can purchase inserts for that). This planner has a more open concept with a large monthly view on the left side and a space for categorized lists or brain drops on the right side. This planner also features extra project breakdown pages in the back.
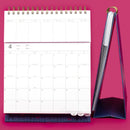
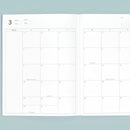
The Simple Monthly Planner is our most traditional layout, featuring a large monthly planner.
The monthly view is where your macro, or your big picture, schedule goes. Deadlines, due dates, travel plans, ANYTHING at all that you need to have a birds eye view of. (If that includes details like your dentist appointment at 2pm on a Tuesday, then so be it, but I would save details like that for the shorter pages.)
The weekly view is where you micro, or detailed, schedule and tasks go. These can be things associated to the items on your monthly view - they are the details of that view. These can also be things that stand alone - meetings, schedule, task items that happen in your daily life.
Check out this reel (and the "month vs week" highlight on our IG channel) for details on this.
As with all of our planners, these definitions are fluid. You can be like Nancy and include details in your monthly view (like that dentist appointment) and use the short pages to echo those details and include detailed tasks, you can be like Mabby and use the monthly view for your family's schedule and the weekly pages for your daily task lists, you can be like Laurel and use the monthly view for your marketing schedule and the weekly pages for your time blocked schedule and daily task list, or like many of the users out there who have found their best way. The recommendation above is the most overarching and basic use and will help you to get started with your Laurel Denise planner.
The answer is not yet and (potentially) coming soon! My love language is helping people understand just how capable they are once they have a planner system that works for them, but these things take time and energy. Pester Laurel on Instagram and maybe she'll fold faster than we think :)
Our Vertical and Horizontal Weekly planners come in Standard (9x12) and Mini (7x9).
Our Project planners are available in Standard (9x12), Sewn Binding (8x10), and Mini (7x9).
Our Portrait planners are available in Standard (8x10) and Mini is coming with our 2026 collection.
All detailed sizing information for every Laurel Denise planner can be found in the photos of each product.
Horizontal Weekly Planners
Vertical Weekly Planners
Project Planners
Portrait Planners
Simple Monthly Planner
There are so many reasons people pick a specific planner size! Here are a few we have noticed come up quite often:
1. Handwriting size *can* matter. We have images on each product listing showing several people's handwriting so that you can see how your handwriting compares and which size to pick based on that.
2. If you don't tend to plan in detail and don't have a full schedule, the Mini planner is for you.
3. If you are just starting your planning journey, we recommend starting with a Mini size.
4. Our planners leave ample room for all of the things, which can make having them fully open feel larger than your usual planner. If this feels intimidating, choose the Mini size.
5. If you want to use your planner to plan work, personal, kids, all of the lists, notes, and your cat's medication schedule, choose the Standard size.
6. Contrary to what it may seem, all of our sizes are pretty portable. The Standard size is about the size of a traditional laptop. If you have a handbag and want your planner to stay there, we suggest going with a Mini.
Our private Facebook Group is a treasure trove of information, inspiration, ideas, and encouragement. It’s a uniquely positive space where members also enjoy exclusive early access to all Laurel Denise launches.
General
If you are like us and can't wait to share your latest list or planner hack, apply to be a guest on our "Planny Hour" YouTube Episodes! These special episodes feature you and your planner, showing the team at Laurel Denise just how you make it all work. Fill out this form to apply.
We do! Please sign up on our mailing list for your welcome code and to receive promotional discounts in the future.
Discount codes cannot be combined. Our free shipping threshold discount needs a cart total of $85.00. If a discount code brings your order to less than $85.00, the free shipping will not be applied to your cart and you will need to add additional product to meet free shipping.
Our monthly tabbed pages are 120 lb paper and all other pages are 80 lb. Fear not, we've completed pen tests galore and the only "pen" that bleeds through is a Sharpie marker.
Our paper products are not customizable. We have heard from many people who have decorated their planner covers with stickers, paint and more and would love to see how you make it uniquely yours!
Laurel’s current favorite is the 0.3 Frixion Erasable Pen. Our Amazon Favorites Shop is filled with our can't-live-without pens, planner, and lifestyle accessories.
Schedule
We’re so excited to share our upcoming launches with you! Here, you’ll find all the details you need about our upcoming launches and sales. If you have any other questions, feel free to reach out — we’re always happy to help!
February 2025:
2/27: Undated Collection Launch (12pm ET) | Join us on Instagram Live where we’ll be showcasing all the collection items and answering your questions!
April 2025:
4/9: 2025-2026 Planners + Teacher Collection Launch (12pm ET) | Join us on Instagram Live where we’ll be showcasing all the collection items and answering your questions!
September 2025:
TBD: 2026 Collection Launch
November 2025:
TBD: Inserts + 2026 Additional Accessories
Black Friday: Free gift with purchase (no additional sale on products)
