


Team Favorites: June 2026
JUN 30, 2026

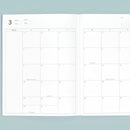
If you have ever opened a new planner, stared at the blank pages, and immediately felt overwhelmed, you are not alone.
You might be excited to use it. You might really want it to work. But then your brain says, “What if I put the wrong thing in the wrong place?” and suddenly you are afraid to even write your name.
Fear not, my friend, that is exactly what the Sticky Note Method is for.
The Sticky Note Method is a simple way to move into your planner, experiment with layouts, and get started without pressure. It is especially helpful if you tend to overthink, get stuck at the beginning, or need to see things before they make sense.
In this post, we will walk through what the Sticky Note Method is, why it works so well, and how to use it to actually start using your planner.
If you prefer to watch instead of read, we also have a YouTube video where we show the method in action with real planner examples.
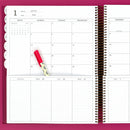
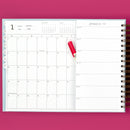
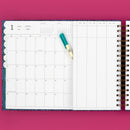
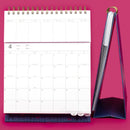
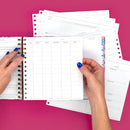
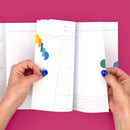
The Sticky Note Method is a way to get started in your planner using removable sticky notes.
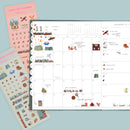
Instead of writing directly on the page right away, you write what you want to include in your planner on sticky notes, like birthdays, tasks, or meal planning. Then you place those notes into your planner where you think they might work.
And here is the important part.
You can move them.
You can change your mind.
You can try something, decide you hate it, and move it somewhere else.
Nothing is permanent at first.
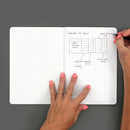
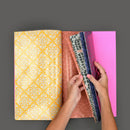
Once the layout feels right, you remove the sticky notes and start writing directly in your planner. By then, the scary part is already over.
Many people do not struggle with planning. They struggle with starting.
The Sticky Note Method gives you a low pressure first step. You are not committing. You are just placing notes and seeing what happens.
That alone can be enough to break the freeze.
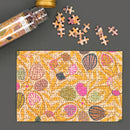
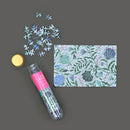
Use any sticky notes you already have. The ones hiding in your junk drawer totally count.
That said, using our sticky notes designed to fit your planner can make experimenting much easier and a little extra satisfying when they fit perfectly in the box.
On separate sticky notes, write down what you want to include in your planner.
This might be appointments, to do lists, notes, gratitude, habits, birthdays, travel, or work planning.
If you are sitting there thinking, “I do not even know what I am supposed to put in a planner,” you are not alone.
We have a free printable that helps you identify what you want to include in your planner before deciding where everything belongs. It is especially helpful if your brain goes blank when you're in the moment.
Start placing the sticky notes where you think they might work in your planner.
Ask yourself simple questions like:
- Is this enough space for my handwriting?
- Would I actually look here for this?
- Does this feel helpful or annoying?
Move the notes as many times as you want.
You might realize you need more space for some things and less for others.
You might leave some areas blank and that's totally okay! You do not have to fill every space on day one.
Once the layout feels right, remove the sticky notes and start writing directly in your planner.
This is the moment where things usually click. The planner stops feeling intimidating and starts feeling usable and yours.
If you want to see real examples, our YouTube video walks through the Sticky Note Method step by step and shows how layouts go from sticky notes to pen on paper.
If you're a visual learner, watching the video can make everything click much faster. And we promise, it's a fun watch!
The Sticky Note Method is not about perfection.
It's about giving yourself permission to start without having everything figured out.
You do not need a perfect layout.
You do not need to fill every space.
You do not need to get it right the first time.
You just need sticky notes and a willingness to try. You've got this!

