


Team Favorites: June 2026
JUN 30, 2026
Here we are at the beginning of the year. You have your planner, I have my planner, and we are both two terrified humans absolutely frozen in place because we don't want to mess up this thing of beauty in front of us. All of those crispy, white, perfectly un-touched white pages. Those covers without any dings or dents. I know it, you know it. But, we bought planners in order to, well, plan! So, let's put perfectionism aside and remember that planners are meant to be lived in!
Here is a simple step-by-step guide to moving into your 2023 Vertical Weekly Planner and facing our fears:
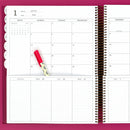
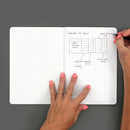
Step 1. Decide if you're doing to use colors to coordinate various people, subjects, or categories in your planner. If this overwhelms you, don't do it! You could also try it for one month and then skip it for the rest. I use blue for work, green for my kids, yellow for exercise, and purple for personal. I usually write in my erasable black pens and then use my favorite erasable highlighters to add the color. I like to keep a color key at the top of my monthly view.
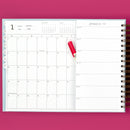
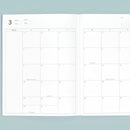
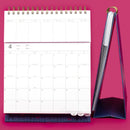
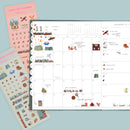
Step 2. Fill in birthdays, anniversaries, deadlines, + other important dates on your monthly spreads. If this is a birthday, anniversary, or remembrance day, I write this in black to the right of the number on my monthly view. If this is a work-related deadline or family event, I write it in the larger monthly block space and then highlight the item.
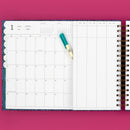
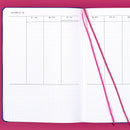
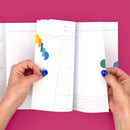
Step 3. Decide how you are going to layout your short pages for the first month. This can change often depending on how busy your week is, so give yourself the freedom to just set it up one month at a time. For some layout ideas for how to organize your appointments and life on the weekly short pages, check out this Instagram Reel or this longer YouTube video.
Step 4. If you have any appointments you made months ago (you know, all of those things you've been putting on a sticky note to go into your new planner), put them onto your short weekly pages on the correct day.
Step 5. If you have any tasks associated with your appointments ("fill out paperwork", "confirm time/place", "send birthday cards", etc), put those in the correct day's to-do list column (usually about a week before the appointment). If you are just trying out a short page layout, write those appointments and tasks in pencil so that you can remember them in the future on the correct day. When you arrive at that correct day or month, you can fix the appointment to match your month's planning style.
Step 6. Now we are going to do something similar to Step 4, but with our important dates that are written on the monthly spread. Our view lets you look ahead so you can put reminders in before it's too late. Things like "send birthday gift", "sign up for camp", "meal plan", "book hotels", "confirm logistics", "schedule photo shoot" are our favorite high end reminders to include here. As you enter into each week, you can add more specifics into each weekly short page that coordinate with your actual schedule. Right now, we are just setting it up for the year.
Step 7. Check out last year's planner. Were there things that happened during certain months that you'd like to prepare for this year? Were there things you'd like to make sure you don't forget about this year? I like to put those things in my monthly to-do list column with some notes.
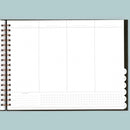
Step 8. Decide what you'd like to track in your planner's back pages and take some time to set those pages up. Some ideas are: Books you've read this year, Acts of Kindness you'd like to work into the year, Note-Taking Pages, Future To-Do Lists, Gifts You've Given List, Yearly Habit Tracking. Pinterest has so many great ideas for bullet journaling that can be worked into our planner, especially the back pages.
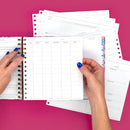
Step 9. This is when I actually dig in and begin planning my January month ahead. I really try to just do this one month at a time. Usually I start the next month during the last week of my current month (I go where my anxiety tells me I need to go - if my anxiety says that it needs to see the next month all set up to sleep, then I go ahead and do that - ha ha!) As a small business owner, I use my monthly page to put my marketing plan and deadlines on (I write this on washi tape or cut sticky notes to be small so that I can move the tasks around if needed), then I list nitty gritty appointments for the month (mostly wellness items or things for my family), and start in on my daily to-do lists. Each short weekly page gets more filled out as the month goes on. You can see examples live on Instagram where I am constantly sharing pictures of my actual planner.
And then...well, then, I just keep going! Planning makes me feel peaceful and I hope it does the same for you. If you'd like, take this moving in process one step at a time so you don't feel overwhelmed. Do one step per day if you need to!
Lastly, some additional videos and tips:
Fun Fact: When I designed this planner, the graphic designer that I work with to make sure everything is set up perfectly looked at me and I look at her and we said, "hey, wow, did we just make the best planner ever?" [insert humility.] It was a zoom moment in time. And, after a year spent using this Vertical Weekly Planner layout, I stand by this comment. I mean, except for the Horizontal Weekly Planner and the Monthly Project Planner. Okay, okay, I love all of my babies the same amount...

